Note: You are viewing an old revision of this page. View the current version.
This was submitted by AlGoff to the OriginalHammondLeslieFaq
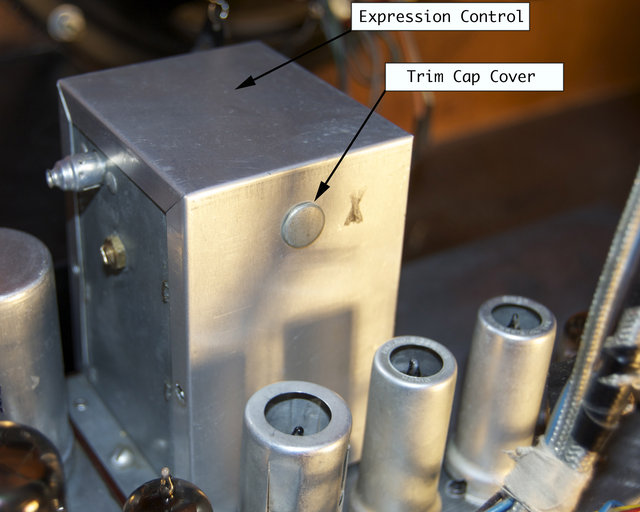
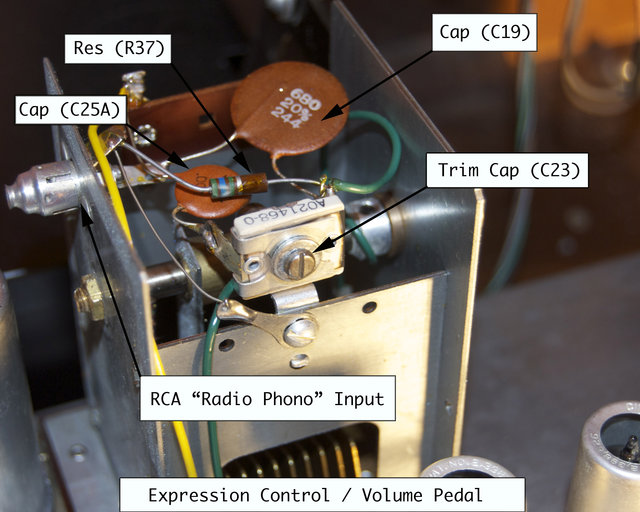
In organs using either the AO-28 or AO-29 preamps (this includes the B-3, C-3, A-100, ?M-3, ?M-100, amongst others) driving a Leslie (or similar) speaker, the output level can be adjusted as to the amount of distortion ('growl') desired. The preamp drive level is set by adjusting a trimmer swell capacitor accessible behind a removable plug located on the cover of the box containing the swell capacitor. (On some spinets there is no access plug, and the whole expression capacitor cover box must be removed to access the trim screw.)
Here's a picture which shows the plug you need to pull. (The plug is labeled "Y" --- and it's upside-down because the picture is of an A-100.)
 http://theatreorgans.com/hammond/faq/files/bri-pics/73288_11.jpg
Here is the expression control on a M3 with cover on and off.


The procedure (requires two people):
The caveats: Increasing the drive level by turning the trimmer more will only cause problems, as distortion can excessively heat the upper driver and woofer and may lead to their premature failure. The classic HammondGrowl is a direct result of correct preamplifier drive adjustment, as well as a well maintained organ and Leslie. Most organs should require a trimmer adjustment no more than 1 to 1 1/2 turns open.
The test: To test your freshly adjusted organ and Leslie - If you have it adjusted for a slight distortion at maximum volume, the distortion should disappear or be greatly reduced by simply pushing in the first two drawbars 2 clicks to position 6. It should still be very loud and very clean, but should have no distortion. The desired result is to have some HammondGrowl on demand, and a clean organ sound at other times.
Trek Solid-State Preamp Organs with solid-state Trek-II preamp should be set almost the same way, but the max drive level on the preamp is adjusted with the volume pot attached to the swell pedal control arm. Loosen the set screw and use a small screwdriver to turn the pot within the arm - do not remove the arm. All other adjustments are the same.
The content of this page is Copyright (C) 2000, 2001, 2002 Geoffrey T. Dairiki and
the other authors of the content, whoever they may be.
This is free information and you are welcome redistribute it
under certain conditions; see
http://www.dairiki.org/HammondWiki/opl.html for details.
Absolutely no warrantee is made as to the correctness of
the information on this page.